在右上角或者左上角实现fork me on github
效果图:
实现方法:
戳这个链接或这个链接,选择喜欢的图标样式,并复制代码,下面图片红框中右侧的代码: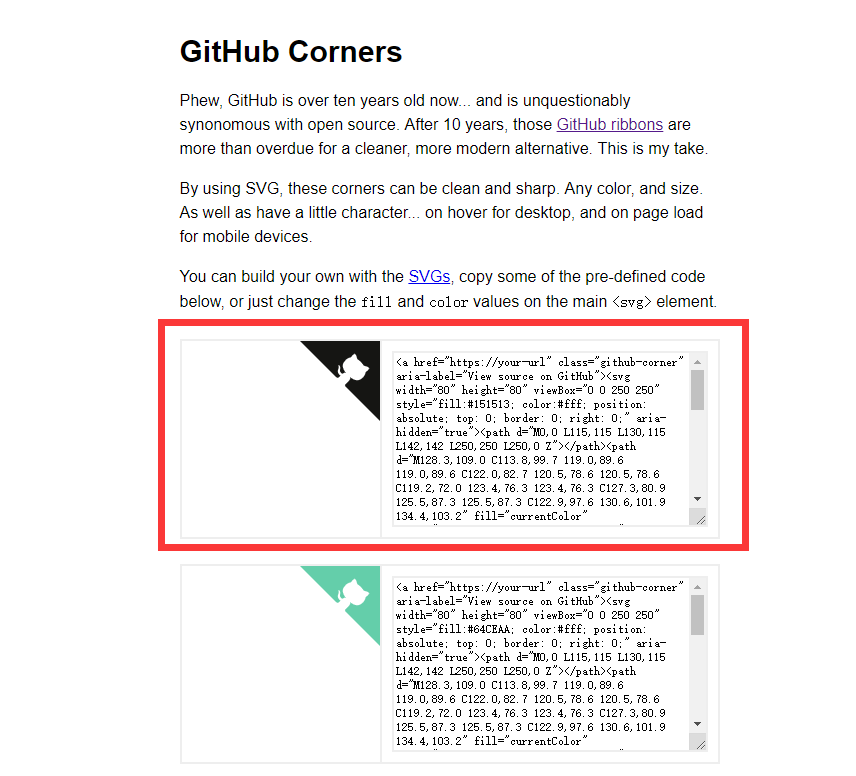
打开博客主目录文件 -> themes -> next -> layout -> _layout.swig -> 搜索 class="headband" -> 将刚才复制的代码粘贴在下面 -> 并把 href 改为你的github地址
添加RSS
效果图: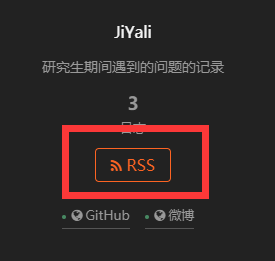
实现方法:
找到博客主目录文件 -> 右键 Git Bash Here -> 执行 npm install --save hexo-generator-feed -> 安装结束后,打开博客主目录文件 -> 打开 _config.yml -> 在末尾添加代码:
# Extensions
## Plugins: http://hexo.io/plugins/
plugins: hexo-generate-feed
再打开 themes -> next -> _config.yml -> 搜索 rss -> 在 rss: 后面添加 /atom.xml,,注意在冒号后面要加一个空格
侧边栏社交小图标设置
效果图: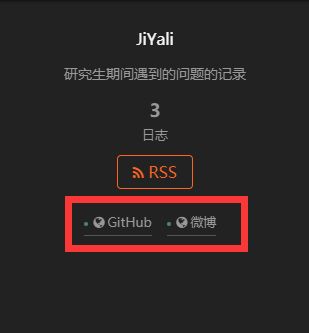
实现:
打开博客主目录文件 -> themes -> next -> _config.yml -> 搜索 social -> 删掉想要展示的社交账号前面的 # 号,将地址改为自己的地址 -> 找到下面的 social_icons: -> 将 enable 设置为 true -> 在图标库找自己喜欢的小图标,并将名字复制在如下位置,保存即可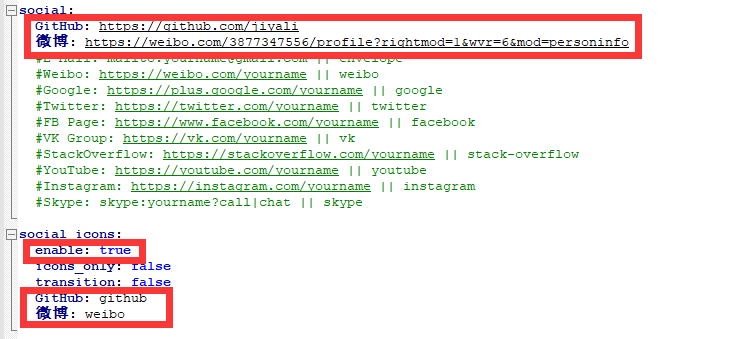
主页文章添加阴影效果
效果图:
实现:
打开博客主目录文件 -> themes -> next -> source -> css -> _custom -> custom.styl -> 在里面粘贴如下代码:
.post {
   margin-top: 60px;
   margin-bottom: 60px;
   padding: 25px;
   -webkit-box-shadow: 0 0 5px rgba(202, 203, 203, .5);
   -moz-box-shadow: 0 0 5px rgba(202, 203, 204, .5);
  }
页面底部跳动的爱心
效果图:
实现:
首先找到图标库,如我现在选择下图中的爱心,那么我要复制的内容就是下图红框中的 fa-heartbeat。
打开博客主目录文件 -> themes -> next -> _config.yml -> 搜索 footer -> 将 name 后面的 user 替换成 fa-heartbeat -> 将 animated 设置成 true -> 将 color 修改为 #ff0000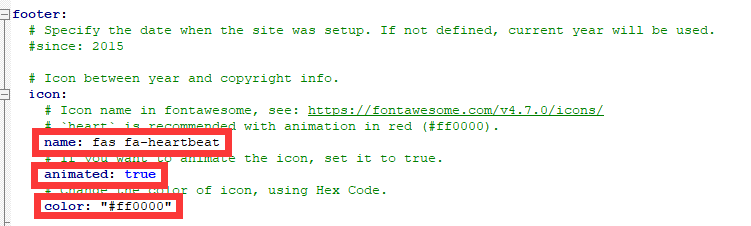
页面访问量统计
实现:
打开博客主目录文件 -> themes -> next -> _config.yml -> 搜索 busuanzi_count -> 将 enable 设置为 true
添加顶部加载条
实现:
打开博客主目录文件 -> themes -> next -> layout -> _partials -> head -> head.swig -> 在第四行后面添加如下代码:
<script src="//cdn.bootcss.com/pace/1.0.2/pace.min.js"></script>
<link href="//cdn.bootcss.com/pace/1.0.2/themes/pink/pace-theme-flash.css" rel="stylesheet">
打开博客主目录文件 -> themes -> next -> _config.yml -> 搜索 pace -> 将 pace 设置为 true
默认的颜色是粉红色的。

隐藏网页底部powered By Hexo / 强力驱动
实现:
打开博客主目录文件 -> themes -> next -> layout -> _partials -> footer.swig -> 搜索 class="powered-by" -> 使用 <!-- --> 隐藏下图所示代码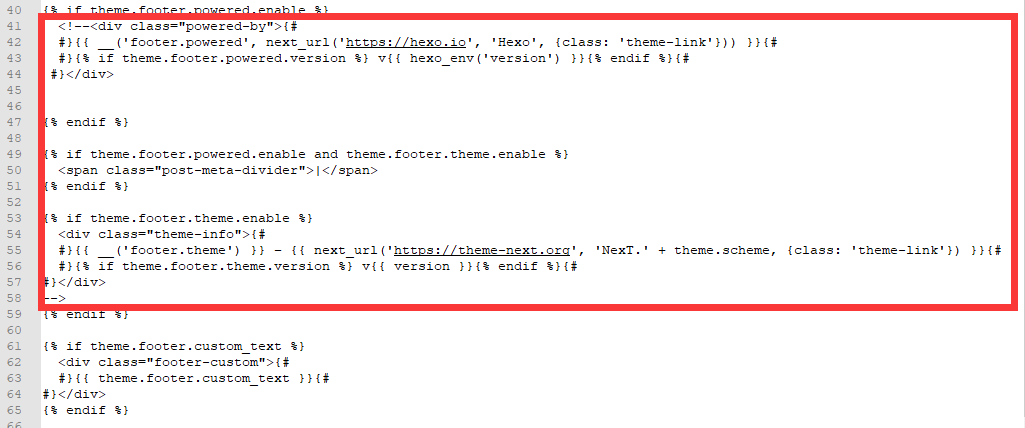
为博客添加萌宠
效果图:
实现:
先给出hexo-helper-live2d 的 Github 链接:https://github.com/EYHN/hexo-helper-live2d
安装并配置 hexo-helper-live2d
安装 hexo-helper-live2d
找到博客主目录文件 -> 右键 Git Bash Here -> 执行 npm install hexo-helper-live2d --save
配置 hexo-helper-live2d
挑选萌物
到插件作者博客挑选你喜欢的萌物,记录下她的名字~
安装萌物
比如说我喜欢 koharu,安装 koharu的步骤:
找到博客主目录文件 -> 右键 Git Bash Here -> 执行 npm install live2d-widget-model-koharu --save
配置萌物
打开博客主目录文件 -> _config.yml -> 添加如下代码:
# Live2D
## https://github.com/EYHN/hexo-helper-live2d
live2d:
  enable: true
  scriptFrom: local
  pluginRootPath: live2dw/
  pluginJsPath: lib/
  pluginModelPath: assets/
  tagMode: false
  debug: false
  model:
     use: live2d-widget-model-koharu
  display:
     position: right
     width: 150
     height: 300
  mobile:
     show: true
执行 hexo clean -> hexo g -> hexo s ,就能看见我们的萌宠啦~
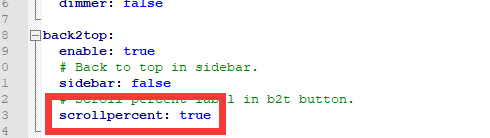
浏览页面的时候显示当前浏览进度
效果: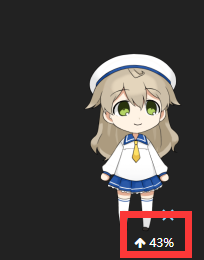
实现:
打开博客主目录文件 -> themes -> next -> _config.yml -> 搜索 scrollpercent -> 将 scrollpercent 设置为 true